Obtaining and installing TIM Plus
Log on to the Tri-Line Gateway using the credentials you created when you first inquired about TIM Plus. Once logged on, you will be directed to your home page, from where you can download your personal copy of the software.
It is important that you download your software only from this location, since each installation package is tagged with a unique ID bound to your account.
Installing TIM Plus
Once you have downloaded the setup package, double-click on it and follow the setup wizard in order to complete the installation:
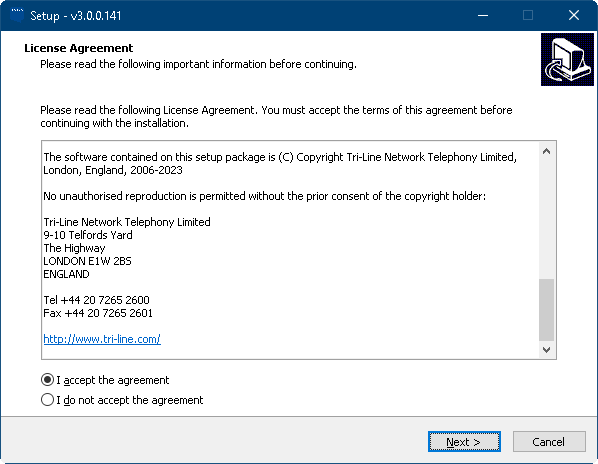
Read through the End User License Agreement, once you have done this, select I accept the agreement and press the Next > button to continue.
You can specify the location where you want your TIM Plus to be installed, by default it will be installed to C:\Program Files (x86)\Tri-Line\TIM Plus. You can change this installation path by pressing the Browse... button and selecting a path. To confirm your path, select the endpoint and press the Ok button. Press the Next > button once you are happy with your install path.

The setup is now ready to be installed in accordance with your selected settings. To continue with the installation, press the Install button. If you would like to make any changes to the installation setting you've already configured, press the < Back button.

Once the installation process has been completed, you will be asked to configure your web server setting for TIM Plus. You can choose to access TIM Plus locally on either the machine IP or via the hostname of the PC. You also need to select the port number you want to run the TIM Plus web server on. If the port is already in use by another application,


You will then see the installation package install TIM Plus. During this, a window will be displayed that shows the status of the installation, as shown below:

Once the window closes, you are ready to set up your TIM Plus in your web browser which should open automatically.
Setting up TIM Plus
Once TIM Plus has finished installing, your web browser should open the configuration screen, as pictured below.
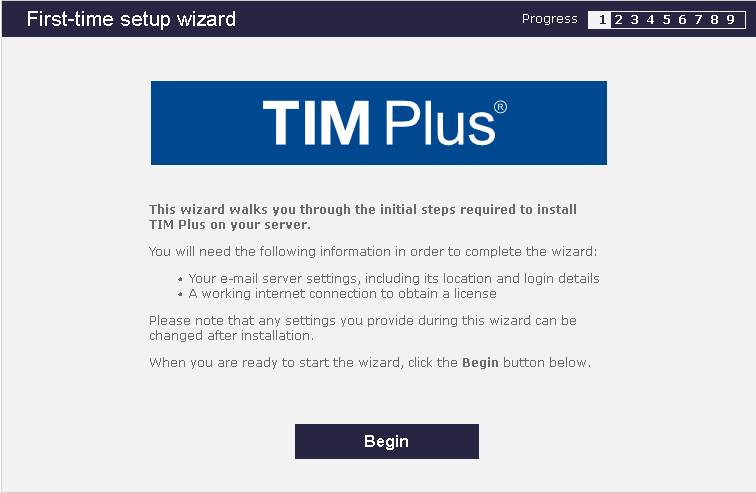
When you are ready to begin the setup and configuration of your TIM Plus, press the Begin button.
If you are using a cloud-based pbx, please see instructions for your make and model. If you are using a non cloud based pbx, please see instructions for your pbx.
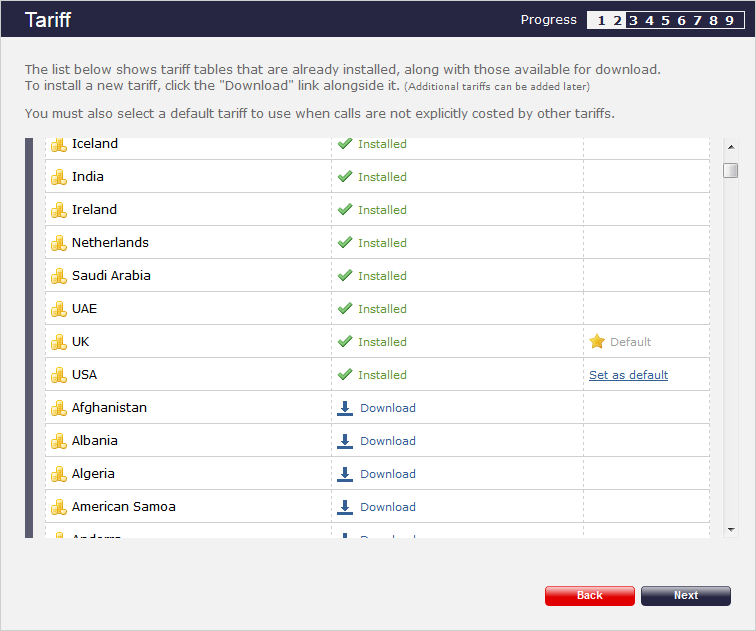
When prompted to select a tariff table, scroll down the list to locate the one relevant to your country and click on Set as default. If the tariff is not installed by default, click on the Download link first.
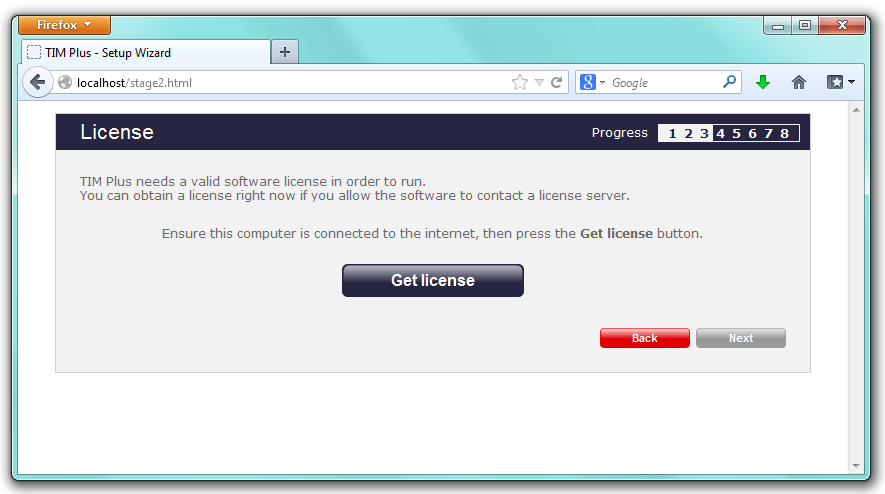
When asked to provide a license certificate, click on the Get license button to retrieve this automatically from our servers.
Obtaining a license manually
If you cannot update your software license automatically, you can apply this manually by following the steps below:
In the Get license window, click on the Next button and copy the product key displayed in the licence box, as shown below:

Log in to the gateway using your username and password.
In the Products panel, click on the TIM Plus product.
In the software license panel, click on the activate now link.
Paste the product code in the activation text box.
Enter the number of users you intend to log and the version number of the software, then click on the Activate Now to obtain the license certificate.
Copy and paste the certificate in the License box of the TIM Plus setup wizard.