3CX Listening Connection
These instructions help you configure your 3CX phone system to work with TIM Plus. Contact your system maintainer if you are not familiar with the configuration of your PBX.
Support files
Ensure the following support files exist in the /config/ folder of the TIM Plus application:
3CX.TDS
3CX.TDT
Contents
Configure the SMDR output
You will need to allow the SMDR port number through your firewall to enable us to connect to your 3CX phone system!
Follow the steps below to enable the SMDR output in your telephone system:
- Log in to your 3CX server and from the main menu go to Settings->CDR, as shown below:
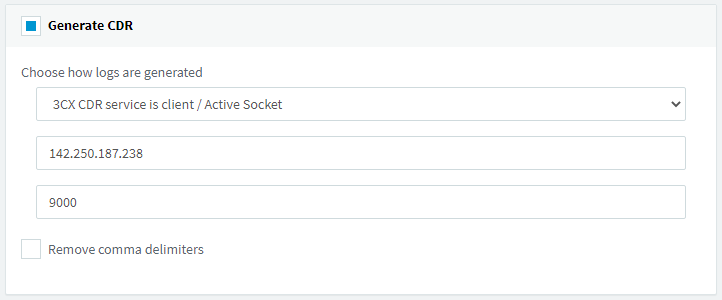
Tick the Enable CDR box and from the drop-down list, select the CDR Serivce is client/Active socket option.
In the IP address field, enter the IP address of the machine running TIM Plus and select a port. We recommend using the 9000 range.
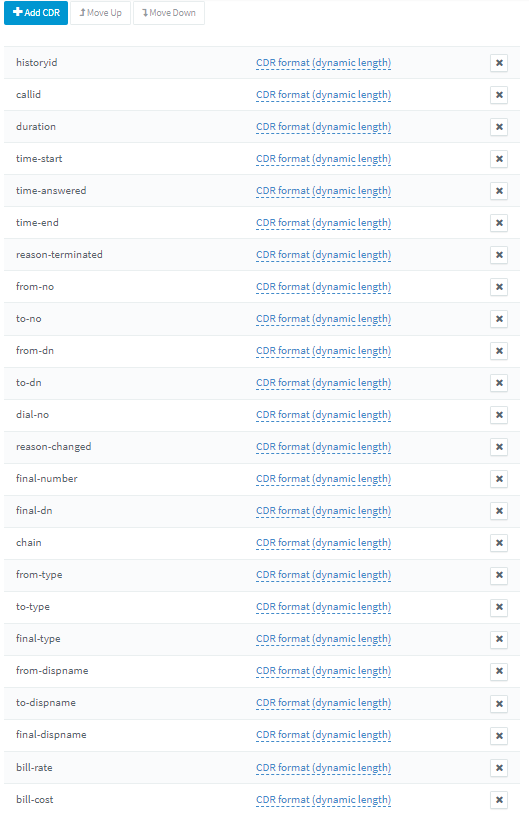
To configure the SMDR output, click on the Configure tab. Enable the required fields, as shown in the screenshot below:
- Click OK to save the changes.
Configure TIM Plus
Follow the steps below to configure TIM Plus to connect to your telephone system:
- Click on the
Directorytab. - If you don't have a site set up, press
Addand selectPBXfrom the drop-down menu. In the dialogue window, name your site and then selectAdd. - Locate the site object you want to configure in the Directory, click on it and select
Properties.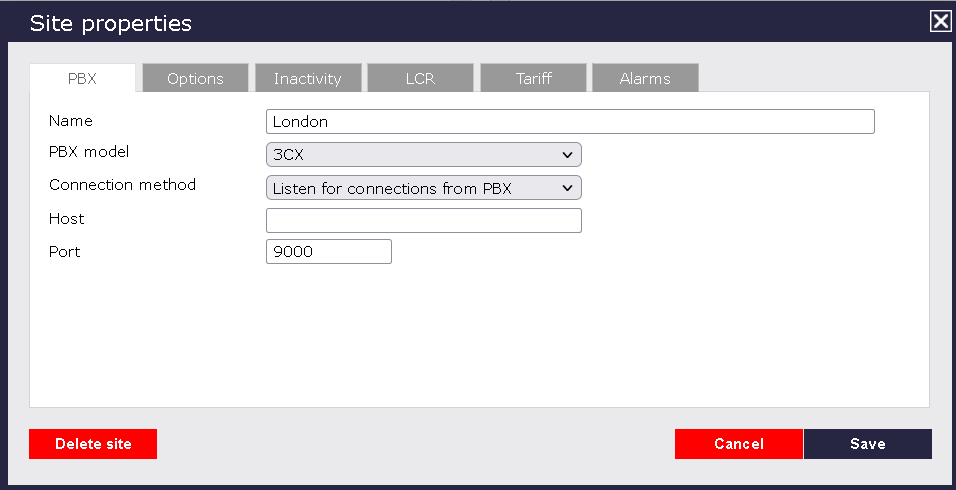
- In the Site Properties window, select 3CX from the PBX model drop-down list.
- In the Connection method field, select Listen for connections from PBX from the drop-down list.
- Leave the host field blank.
- In the Port field, enter the port number configured in the telephone system.
- Leave the Username and Password fields blank.
- In the Connection script field, select 3CX from the drop-down list.
- Click on the
Optionstab and tick the Keep a local backup of any data tickbox, as shown below
- Click on the
Savebutton to apply the settings.