BT Versatility
These instructions help you configure your BT Versatility phone system to work with TIM Plus. Contact your system maintainer if you are not familiar with the configuration of your PBX.
Support files
Ensure the following support files exist in the /config/ folder of the TIM Plus application:
BT Versatility.TDS
BT Versatility.TDT
Contents
Configure the SMDR output
You may need to purchase a license to enable SMDR on this PBX. Please speak to your system maintainer if you are unsure.
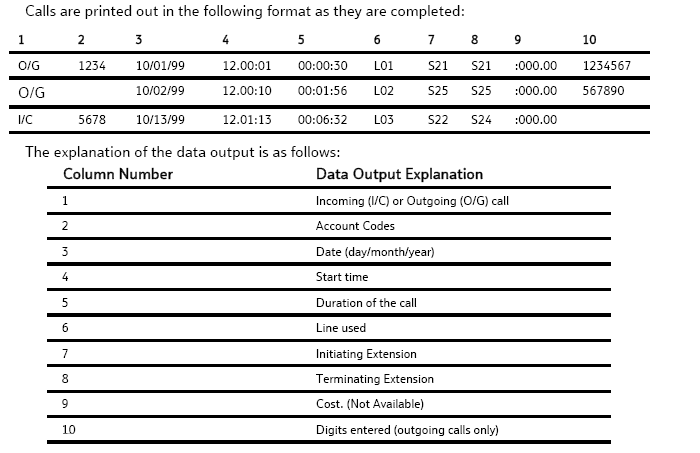
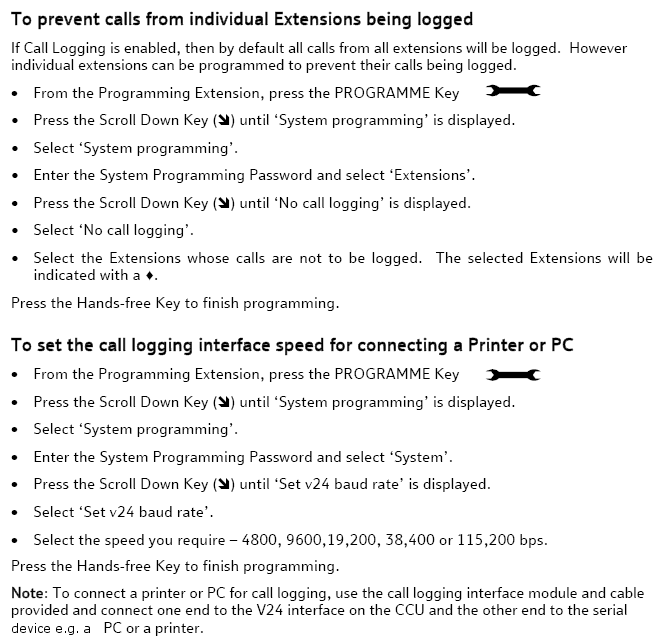
The BT Versatility outputs its SMDR data via a serial port. The default communication parameters for this serial connection are:
- Speed – 4800, 9600, 19200, 38400 or 115200 bps;
- Data - 8 bits;
- Parity - None.
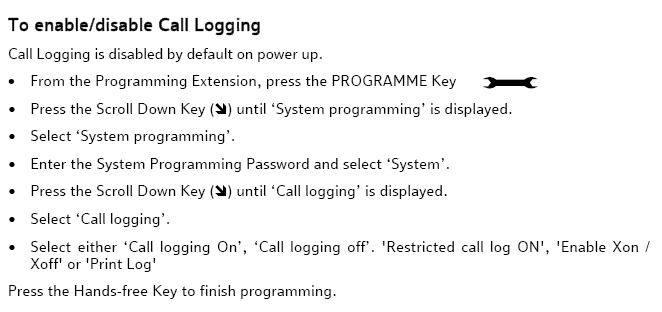
The phone system has an in-built buffer to store the last 500 call records in case the receiving equipment becomes disconnected. This buffered data can be set to output to the serial port during system programming. An X-ON/X-OFF signal can be enabled to allow the Versatility to detect if a compatible device is receiving its SMDR data successfully. The Versatility can also be set to output SMDR data using restricted call logging, whereby the last four digits of any dialled number is masked out.
Follow the instructions below to configure your BT Versatility for use with TIM Plus:
Installing NetPBX
To collect the SMDR data from the serial port and send it to TIM Plus, you first need to install the NetPBX software. For setup instructions, click on the link below:
Install and configure NetPBX
Configure TIM Plus
Follow the steps below to configure TIM Plus to connect to your BT Versatility:
- Click on the
Directorytab. - If you don't have a site set up, press
Addand selectPBXfrom the drop-down menu. In the dialogue window, name your site and then selectAdd. - Locate the site object you want to configure in the Directory, click on it and select
Properties.
- In the Site Properties window, select BT Versatility from the PBX model drop-down list.
- In the Connection method field, select No connection required from the drop-down list.
- Click on the
Savebutton to apply the settings.