Unify - Siemens OpenScape Business - DSN connection
These instructions help you configure your Unify OpenScape Business phone system to work with TIM Plus. Contact your system maintainer if you are not familiar with the configuration of your PBX.
Support files
Ensure the following support files exist in the /config/ folder of the TIM Plus application:
Unify OpenScape Business.TDS
Unify OpenScape Business.TDT
Unify OpenScape Business.DBS
Contents
Configure the SMDR output
You may need to purchase a license to enable SMDR on this PBX. Please speak to your system maintainer if you are unsure.
Follow the instructions below to configure the SMDR output in your phone system. These instructions are taken from the Unify OpenScape Business manual.
- Log on to OpenScape Business Assistant and click on Setup -> Wizards -> Central Telephony, as shown below:
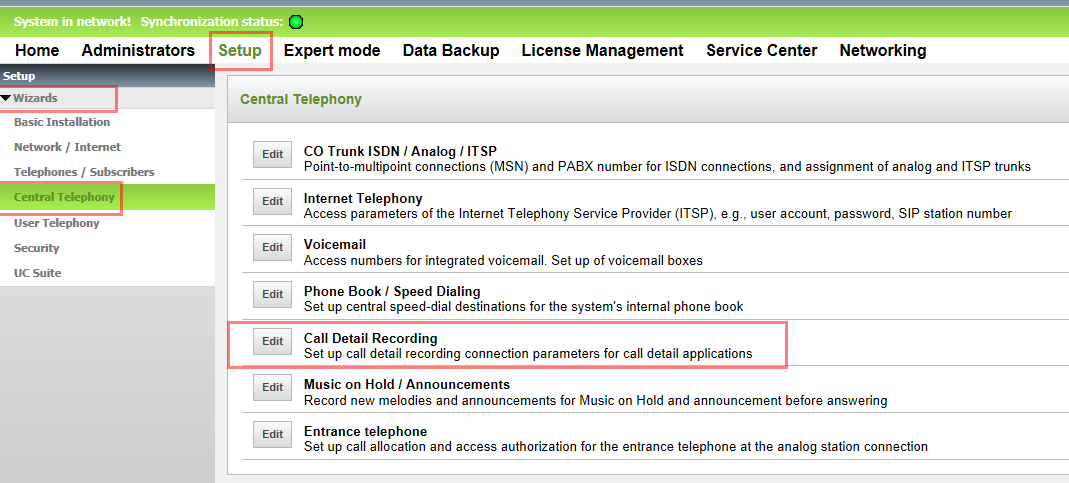
- Click Edit to start the Call Detail Recording wizard.
- In the new window that opens, tick the Activate Call Charge Recording to enable the CDR output, as shown below:

Setting up a DSN connection
The default SMDR output option in the Unify OpenScape Business phone system is HTTPS. To enable TIM Plus to work with Unify OpenScape Business, you first need to set up a DSN connection, by following the steps below:
- Open Windows Control Panel
- Double-click on the Administrative tools icon
- Double-click on the Data Sources (ODBC) icon to open the ODBC Data Source Administrator window
For a 64 bit system, access the ODBC Data Source Administrator from the following location C:\Windows\SysWOW64\odbcad32.exe
- Click on the System DSN tab
- Click on the Add button
- Select Native from the driver list and click Finish
- In the Data source name field enter Unify OpenScape Business
- Click on the OK button to save the changes
An example of an ODBC entry is shown below:

Configuring the interface file
Follow the steps below to configure the interface file to establish an HTTPS connection with your Unify OpenScape Business:
- Open the Unify OpenScape Business.TDT file, located by default in C:\Program Files\Tri-Line\TIM Plus\config.
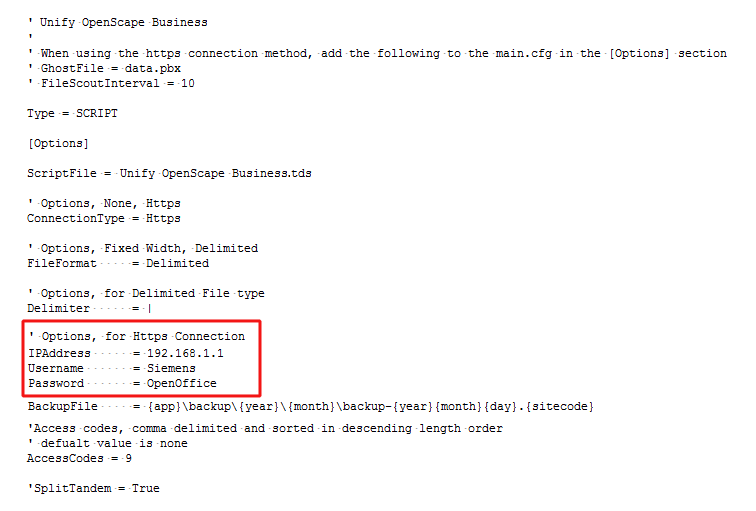
- Edit the file to point to the IP address of your Unify OpenScape Business and enter the relevant username and password, as shown below:
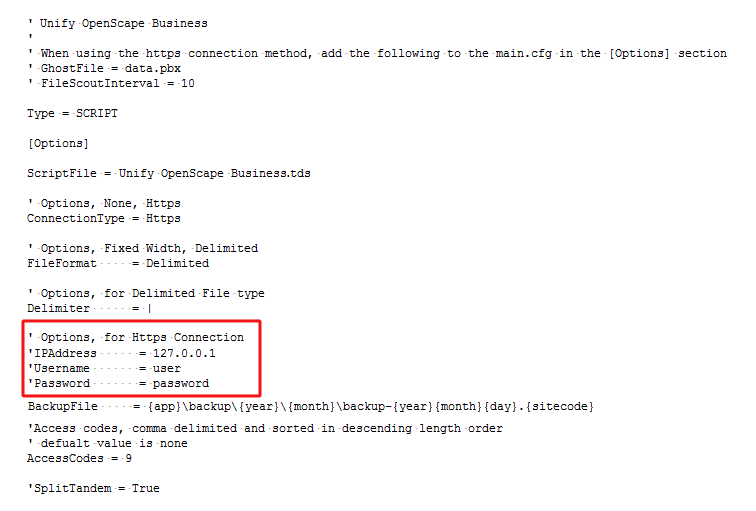
- Remove the apostrophe (') in front of the amended fields to enable them. An example of a configured interface file is shown below:
Configure TIM Plus
Follow the steps below to configure TIM Plus to connect to your Unify OpenScape Business:
- Click on the
Directorytab. - If you don't have a site set up, press
Addand selectPBXfrom the drop-down menu. In the dialogue window, name your site and then selectAdd. - Locate the site object you want to configure in the Directory, click on it and select
Properties.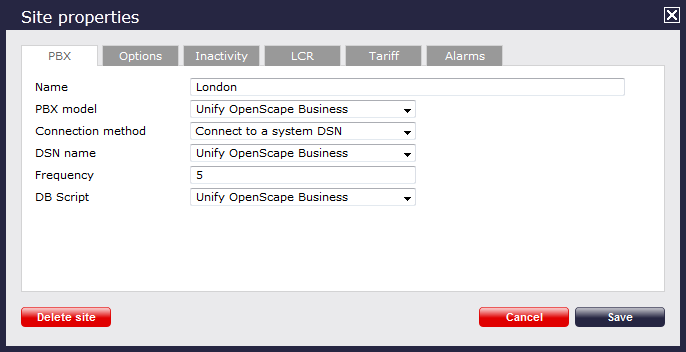
- In the Site Properties window, select Unify OpenScape Business from the PBX model drop-down list.
- In the Connection method field, select Connect to a system DSN from the drop-down list.
- In the DSN name field, select Unify OpenScape Business from the drop-down list.
- In the Frequency field, enter 5.
- In the DB script field, select Unify OpenScape Business from the drop-down list.
- Click on the 'Options' tab and tick the Keep a local backup of any data tickbox, as shown below

- Click on the
Savebutton to apply the settings.